This tutorial will show you the basics on how to use the PuTTY SSH/Telnet program to connect to tentacle.net.
Putty is very small; less than 350k. You can even fit it on a floppy disk and bring it with you.
You can download PuTTY for free at this URL:
http://www.chiark.greenend.org.uk/~sgtatham/putty/download.html
It does not need to be installed; just put it where you want and double-click to run it.
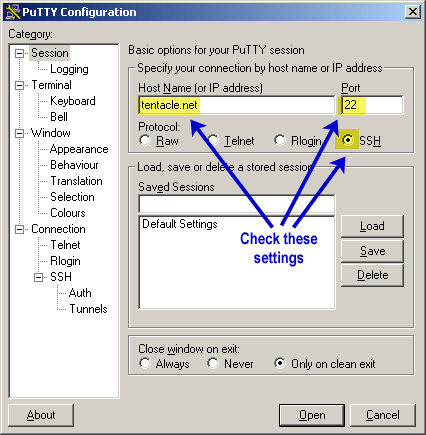
When you first launch the PuTTY program, you should be at the main PuTTY Configuration screen as shown above. Instead of making a profile, we will do a Quick Connection.
On this screen, we will need to make many entries as shown in the picture above.
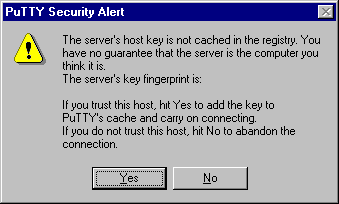
If this is the very first time you are connecting using this program to this particular server, then you will receive a warning about how SSH has found a new key, etc. This is normal, it's part of the encryption process. Select Yes. What this does is save the server key on your computer. If it changes, it will warn you since it can be an indication of a certain kind of attack.
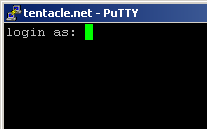
Once you've reached this point, it should behave like the telnet sessions you're familiar with. Enter your username and password and you'll be logged in.
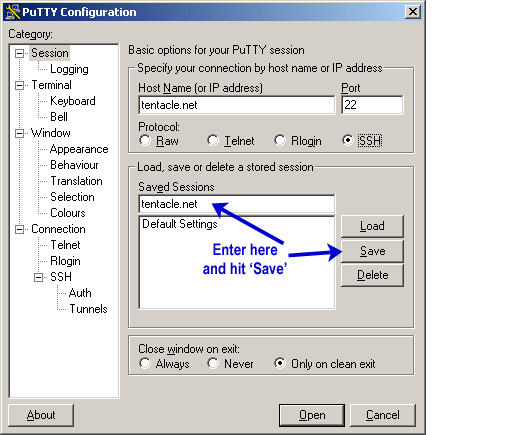
If you wish to save your session, follow the 3 steps pictured above: